Emacs Berlin Beginners Curriculum
Table of Contents
1 Installation
How to install Emacs depends on your operating system. Make sure you install "GNU Emacs", and not an alternative version like "XEmacs" or "Aquamacs".
1.1 Windows
Windows versions of GNU Emacs are distributed as zip-files, which can be found
on gnu.org ftp mirrors. Find the zip file with the highest version number, at
time of writing this is emacs-24.5-bin-i686-mingw32.zip, and download it.
Create a directory where you want to put Emacs, for example C:\Program
Files\Emacs and unpack the zip file there.
The runemacs.exe program in the bin directory will start Emacs. The
addpm.exe program will add Emacs to the start menu.
1.2 OS X
OS X already comes with a version of Emacs installed, but it's very old (Emacs 22), and it doesn't have GUI support, so it only works inside a terminal. You want to avoid using this version.
If you have Homebrew available then that is the most straightforward option.
$ brew update
$ brew install emacs --with-cocoa
$ brew linkapps emacs
Alternatively you can download a .dmg at emacsformacosx.com.
That should be enough to get you going. Emacs Redux has some more tips on setting up Emacs on OS X.
1.3 Linux
Your package manager should have ready-made packages available. If you have a
graphical package manager look for an "emacs" package, or install the package
from the command line with apt-get or yum.
2 First steps
2.1 Hello, Emacs
If you've managed to install and start Emacs, you should see a screen that looks like this,
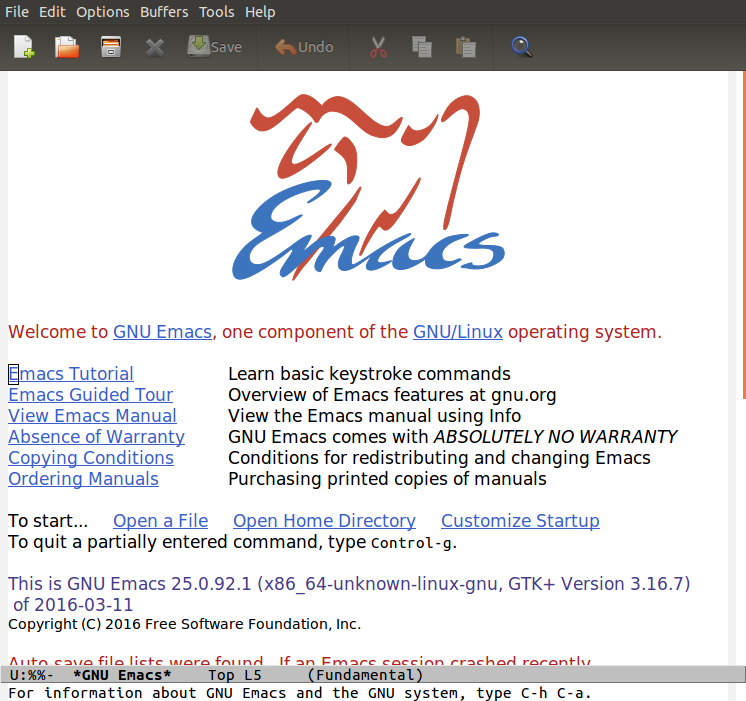
This screen isn't of great interest to us, and in fact we will disable it soon. The only thing for us to do here is find the Emacs version (look for where it says "This is GNU Emacs …"). Verify that you have version 24.5 or later.
Now you can exit this screen by pressing `q`, and you should now find yourself
in the *scratch* buffer.
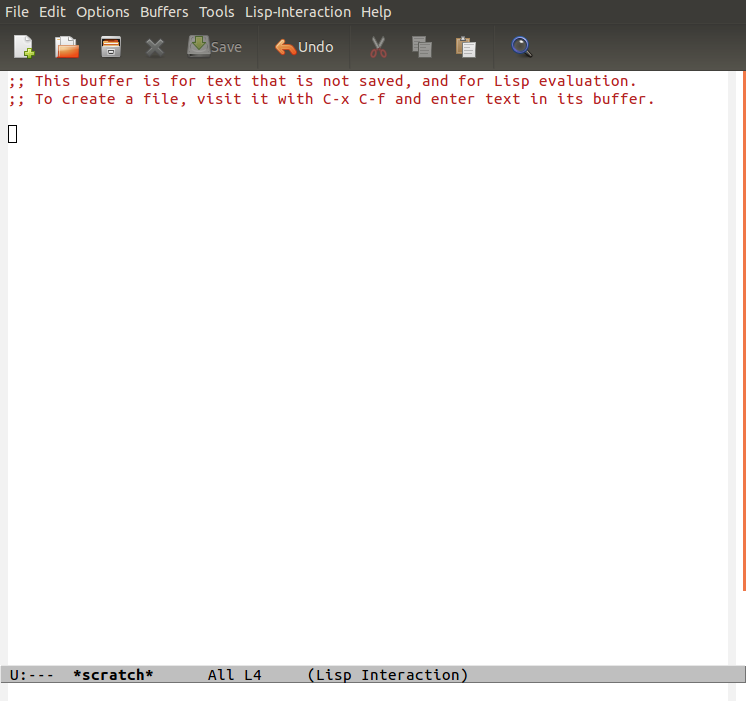
Try typing this line of code
(dotimes (x 10) (insert "\nHello Emacs!"))
Now place the cursor at the end of the line, so behind the last closing
parenthesis. Press and hold the Ctrl key, and with Ctrl pressed type x
e.
Congratulations! You just wrote and executed your first piece of Emacs Lisp code.
2.2 A word about key combinations
2.2.1 The Control Key
Emacs makes heavy use of key combinations like "ctrl + g" or "alt + x". In the manual and other documentation key combinations are written using a shorthand notation. For example,
C-x- hold
Ctrland typex C-x C-e- keep
Ctrlpressed while typingxe C-x e- press
Ctrlandxtogether, let go ofCtrl, and presse
2.2.2 The Meta (Alt) Key
Besides the Ctrl key, Emacs makes heavy use of the Meta key. This is kind of
sad, because modern keyboards no longer have a Meta key. Instead the "Alt" key
is typically used as "Meta". Some Mac users prefer to use Cmd/⌘ as their
Meta key. Depending on where you got your Emacs from it might even be using
"Cmd/⌘" already.
The Meta key (Alt or Cmd/⌘) is abbreviated with M-.
Here are some key combinations
M-%- search and replace
M->- go to the end of the buffer
M-x emacs-version- check the version of your Emacs
This last one means: press Alt and x together, then type emacs-version,
then press enter. emacs-version is just one of money Emacs command that you
can invoke by typing M-x and then the name of the command.
(You don't need to memorize these key combinations for now.)
2.3 Survival Emacs
From here on it gets real, you should try to practice the commands that follow until they are committed to memory. It's a good idea to write these on a small piece of paper or index card. Keep it close to your computer as a reference.
To exit Emacs, type C-x C-c.
You can quit a partially entered command, type C-g.
To close informational "windows" like an error message or help information, type q
Let me repeat that
C-x C-c |
Exit Emacs |
C-g |
Quit partially typed command |
q |
Close error message |
2.4 Introduction to editing
Emacs predates the modern terminology of copy/cut/paste. Cut is called kill,
this deletes some text from the buffer, and appends it to the kill ring. To
"paste" it you yank it from the kill ring back to the buffer.
The command to "copy" is called kill-ring-save, since it adds a piece of text
to the kill ring, without deleting it from the buffer.
C-y / yank inserts at the current cursor position, which in Emacs
terminology is called point.
| Key | Emacs command | |
|---|---|---|
C-y |
Paste | yank |
C-k |
Cut until the end of the line | kill |
C-SPC |
Start selecting text | set-mark-comand |
M-w |
Copy selected text | kill-ring-save |
C-w |
Cut selected text | kill-region |
2.5 Visiting files
| Key | Emacs command | |
|---|---|---|
C-x C-f |
Open File | find-file |
C-x C-s |
Save File | save-buffer |
C-x s |
Save All | save-some-buffers |
C-x k |
Close File | kill-buffer |
2.6 Switching buffers
| Key | Emacs command | |
|---|---|---|
C-x C-b |
Get a list of all open files | list-buffers |
C-x b |
Switch to another open file | switch-to-buffer |
2.7 Getting help
| Key | Emacs command | |
|---|---|---|
C-h f |
See the docstring for a function | describe-function |
C-h k |
Find which command a key is bound to | describe-key |
C-h i |
Open the Emacs manual (info pages) | info |
C-h m |
See documentation of the current major and minor mode | describe-mode |
2.8 Working with windows
| Key | Emacs command | |
|---|---|---|
C-x 2 |
Split vertically | split-window-below |
C-x 3 |
Split horizontally | split-window-right |
C-x o |
Go to next window | other-window |
C-x 1 |
Maximize window (close all others) | delete-other-windows |
C-x 0 |
Minimize window (close currentk) | delete-window |
3 First steps in Elisp
3.1 evaluating forms
You already used the command `eval-last-sexp`, bound to `C-x C-e`, which
evaluates the s-expression preceding point (the cursor position).
Another command for evaluating is `C-M-x`, which evaluates the outermost form.
3.2 values, variables, functions, setq
TODO
4 create first .emacs/init.el
4.1 A blueprint to get started
There are many ways to organize the configuration of your Emacs. We'll give you a blueprint so you have a structure that you can fill in yourself as time goes on.
Most of the extra functionality will be installed through packages. These can be installed from multiple places, we'll set things up to download packages from the two main "package repositories", GNU ELPA and MELPA.
A package may require some extra setup or configuration, such as customizing
variables or creating key bindings. To keep that all in one place we'll use a
command called use-package, which is itself installed as… a package.
Package-ception!
;; Install packages from these sources
;;   - GNU ELPA: The official GNU package repository, relatively small
;;   - MELPA: The main community-run package archive
(setq package-archives
      '(("gnu" . "https://elpa.gnu.org/packages/")
        ("melpa" . "https://melpa.org/packages/")))

(package-initialize)

;; Download a list of available packages if we don't have it already
(unless (file-exists-p "~/.emacs.d/elpa/archives/melpa")
  (package-refresh-contents))

;; The `use-package' package makes it easy to install and configure packages
(package-install 'use-package)


;; For example,
(use-package multiple-cursors

  ;; install the package if it isn't already
  :ensure t

  ;; configure key bindings
  :bind (("C-S-c C-S-c" . mc/edit-lines)
         ("C->"         . mc/mark-next-like-this)
         ("C-<"         . mc/mark-previous-like-this)
         ("C-c C-<"     . mc/mark-all-like-this)))
4.2 major/minor modes
4.3 get to a "good enough" initial set up
4.4 Language specific sections
For each language that you commonly program in, you should at least install a "major mode". This will provide syntax highlighting and other language-specific functionality. What follows are some example configs to get you started. Just copy over the ones that are relevant to you.
4.4.1 Ruby
There is a Ruby major mode already installed with Emacs, all you need to do is enable it
(use-package ruby-mode)
Packages you could look into in the future include
enh-ruby-moderobechrubyrspec-modeinf-ruby-mode
4.4.2 Javascript
Emacs comes bundled with a js-mode, however you might prefer js2-mode.
(use-package js2-mode :ensure t)
4.4.3 CSS
Emacs comes bundled with CSS mode. A nice extra is rainbow-mode, which shows
the color of color codes.
(use-package css-mode
  :config
  (use-package rainbow-mode
    :ensure t
    :config
    (add-hook 'css-mode-hook 'rainbow-mode)))
Example:
body {
  color: #1e1e1e;
  background: #3e77ff;
}
4.4.4 Clojure
(use-package clojure-mode
  :ensure t
  :config
  (add-hook 'clojure-mode-hook 'cider-mode)

  ;;;; Optional: add structural editing
  ;;
  ;; (use-package paredit
  ;;   :ensure t
  ;;   :config
  ;;   (add-hook 'clojure-mode-hook 'paredit-mode))

  ;;; Give matching parentheses matching colors
  (use-package rainbow-delimiters
    :ensure t
    :config
    (add-hook 'clojure-mode-hook 'rainbow-delimiters-mode))

  ;;; Integrated REPL environment
  (use-package cider
    :ensure t
    :config
    (use-package cider-eval-sexp-fu :ensure t)
    (use-package clj-refactor
      :ensure t
      :config
      (add-hook 'clojure-mode-hook 'clj-refactor-mode)
      (cljr-add-keybindings-with-prefix "C-c C-m"))))
4.4.5 HTML templates
Web Mode does a good job of letting you edit various HTML template files. It knows about several popular template syntaxes, so it can provide smart code highlighting.
Here's an example setup, we configure the file extensions that will use
web-mode, and set the indentation to two spaces.
Web mode provides a bunch of handy keyboard shortcuts, check the web mode website for more information.
(use-package web-mode
  :ensure t

  :config
  (add-to-list 'auto-mode-alist '("\\.erb$" . web-mode))
  (add-to-list 'auto-mode-alist '("\\.hbs$" . web-mode))
  (add-to-list 'auto-mode-alist '("\\.tmpl$" . web-mode))
  (add-to-list 'auto-mode-alist '("\\.html$" . web-mode))

  (setq web-mode-markup-indent-offset 2)
  (setq web-mode-code-indent-offset 2))
5 References
5.1 Emacsish glossary
Emacs is over 30 years old. It was developed in a time when computers took half a room, and before the rise of GUIs and desktop systems. A lot of its terminology also stems from this time, making it sound like Emacsers speak a different language.
For your convenience we have compiled a simple phrase book translation Emacsish to English.
| Emacsish | English |
|---|---|
| point | position of the cursor |
| mark | end of the selected text |
| region | selection |
| frame | window |
| window | split |
| yank | paste |
| kill | cut |
| kill ring | clipboard |
| META key | Alt key |